 PH
PH- Open Finder and navigate to Applications -> Utilities and double-click Boot Camp Assistant.
shorcut key Command+Shift+U click Boot Camp Assistant
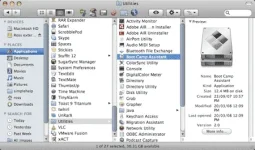
Open Boot Camp Assistant
Note: You’ll now want to plug in the blank USB thumb drive into your Mac computer. Make sure the USB drive has at least 16GB of free space and uses the Master Boot Record partitioning scheme. To check the USB drive’s format, partition it, or erase any content, use your computer’s Disk Utility program. Boot Camp Assistant uses this flash drive to store all of the download media and support drivers of the operating system you wish to install.
Now that you’ve got an install drive of your desired Windows operating system, it’s time to open the Mac’s Boot Camp Assistant. To do this, simply select the Utilities folder from your Mac’s application list and open Boot Camp Assistant. Once the program opens, an introductory screen offers information on the application and also suggests creating a backup of your data before continuing with the Windows install — we highly recommend doing this. Click Continue to advance to the next screen.
After doing this a window opens asking you to select several tasks you wish Boot Camp Assistant to help you complete. To properly continue with the install, check the boxes next to Create a Windows 7 or later version install disk, Download the latest Windows support software from Apple, and Install Windows 7 or later version then click Continue.
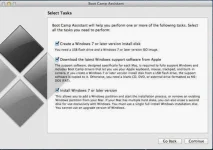
Note: Don't forget to check the Download The Latest Windows Support from Apple because this the driver for all like keyboard,wifi,sounds, ETC.
- *********** Windows install disc, or choose your Windows installation ISO, then click Continue. Boot Camp erases your USB flash drive and prepares it for Windows installation. After the flash drive is prepared, close the Boot Camp Assistant window to quit the app.
- Use the tables You do not have permission to view the full content of this post. Log in or register now. to find the Windows support software (drivers) you need for the version of Windows and the Mac that you're using.
- Click the link in the table to download the related software.
- After the file downloads, double-click it from the Finder to decompress (unzip) it.
- Open the resulting folder. Locate the following files in this folder and drag them to your USB Flash drive. When prompted if you want to replace the existing items on the flash drive, click Yes.
$WinPEDriver$ (folder)
AutoUnattend.xml
BootCamp (folder)
7. Set the partition size for the Windows installation. To change the amount of space to dedicate to Windows 7, click the small divider between Mac OS X and Windows, and drag it to the left.
Note: Windows 7 requires at least 16 GB of hard drive space to install but keep in mind that the this space will also need to accomidate any applications installed and your saved documents. a good starting point might be to set the size 40GB or more (depending on the number of applications you plan to install). Example: Microsoft Office 2010 Professional requires aroud 3GB to install.
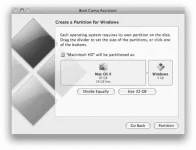
8. Once you’ve determined how much space you want to dedicate to Windows 7, click the Partition button, or simply click the Divide Equally button to devide the partitions equally.
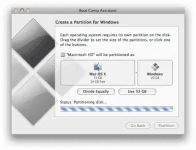
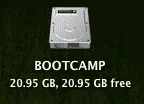
9. Once the partition is created, you will have a new BOOT CAMP drive icon on your desktop.
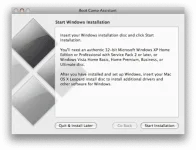
10. Next, *********** Windows 7 DVD or Flash Drive and click the Start Installation button.
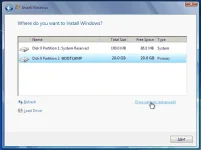
11. Your Mac will restart and boot to the Windows 7 DVD or Flash Drive. You’ll be prompted with a window asking which partition you want to install Windows on. Select the partition labeled BOOTCAMP. Then, click Drive options (advanced).
12. With the BOOT CAMP volume still selected, click Format.
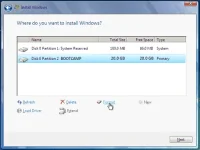
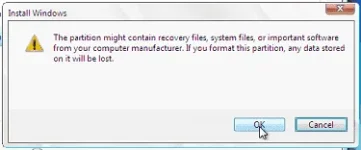
13. Click OK when notified that files will be lost. Note: (The new partition will not contain any files).
14. Windows 7 will begin to install, during the installation your system will reboot, when this happens, you’ll need to remove the Windows 7 DVD.
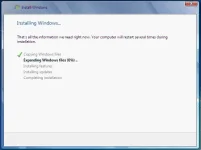
15. With the Windows 7 DVD removed, your Mac will automatically boot back into Windows 7, and the installation will continue. You’ll be prompted to select your language, keyboard layout, Product ID, etc. Follow any additional instructions to complete the installation of the Windows 7.
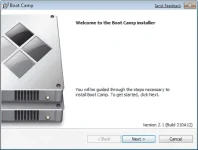
16. Click Next when the Boot Camp installer launches.
this the Boot Camp Driver or the one you dowload windows support software from apple before you proceed this
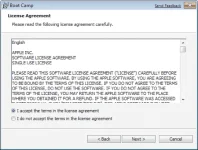
17. Select I accept the terms in the license agreement and then click Next.
18. Make sure that Apple Software Updatefor Windows is checked, and then click Install.
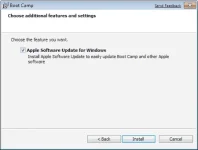
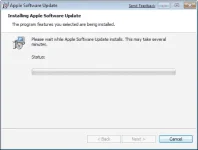
19. The Boot Camp installer will install all the required drivers.
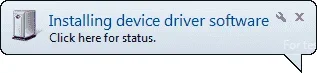
20. Notifications will pop up with each driver that gets installed.
21. Once the driver installation has completed, click Finish.
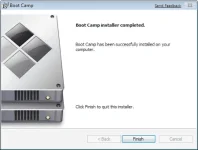
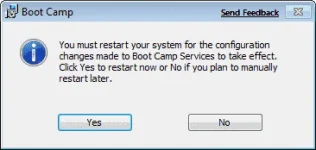
22. You’ll be prompted to reboot, remove your OS X DVD from the drive, and click Yes to restart.
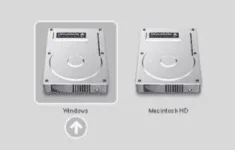
23. When your Mac boots, hold down the ALT/OPTION key to select which Operating System you want to boot to. (If you don’t press the Windows button, your Mac will boot to the Mac OS by default.)
i hope we can help you this thread
Thank You.