 PH
PHCredit to: YFS 
Compatibility:
Windows XP or Higher
Things you need:
1. Internet Connection (DSL or any LAN connected internet connection)
2. Wireless Card if you are using a desktop computer.
IMPORTANT: Enable your internet connection sharing by following the Steps:
For XP and Windows 7.8 Operating Systems:
1. Go to "Open Network Connections".
2. Right click " Wireless Network Connection" then go to Properties.
3. Click "Advance" Under "Internet Connection Sharing"
4. Check "Allow other network users to connect through this computer's Internet connection"
5. Optional: Check " Allow other network users to control or disable the shared Internet connection"
6. Click "OK".
Steps: For Desktop Computers / Laptops
1. Make sure your WiFi Card is reading running. To know if it is running already you should detect any WiFi Connections of you neighbor.
2. Open CMD or Command Prompt. ( If you are using windows 7 operation system, run it as administrator)
3. Type "netsh wlan set hostednetwork mode=allow ssid=NAME key=PASSWORD" Then ENTER
(You can replace "NAME" of your desired WIFI Name and "PASSWORD" your desired password. Be sure you password should not be less than 8 characters.)
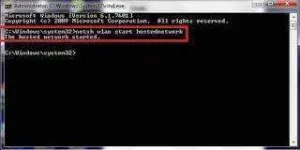
4. Then type "netsh wlan start hostednetwork" Then press ENTER key.
(There you go.! You have you own wifi for free!.)
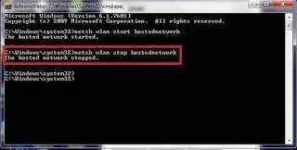
If you want to stop your WiFi: Type "netsh wlan stop hostednetwork". Then Press ENTER key.
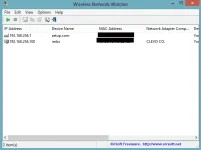
To see whos connected on your Wifi, you can use this free tools:
Download: see in the attachment
Password: imbz_ph
Enjoy just feedback Hope na nakatulong ako .
Compatibility:
Windows XP or Higher
Things you need:
1. Internet Connection (DSL or any LAN connected internet connection)
2. Wireless Card if you are using a desktop computer.
IMPORTANT: Enable your internet connection sharing by following the Steps:
For XP and Windows 7.8 Operating Systems:
1. Go to "Open Network Connections".
2. Right click " Wireless Network Connection" then go to Properties.
3. Click "Advance" Under "Internet Connection Sharing"
4. Check "Allow other network users to connect through this computer's Internet connection"
5. Optional: Check " Allow other network users to control or disable the shared Internet connection"
6. Click "OK".
Steps: For Desktop Computers / Laptops
1. Make sure your WiFi Card is reading running. To know if it is running already you should detect any WiFi Connections of you neighbor.
2. Open CMD or Command Prompt. ( If you are using windows 7 operation system, run it as administrator)
3. Type "netsh wlan set hostednetwork mode=allow ssid=NAME key=PASSWORD" Then ENTER
(You can replace "NAME" of your desired WIFI Name and "PASSWORD" your desired password. Be sure you password should not be less than 8 characters.)
4. Then type "netsh wlan start hostednetwork" Then press ENTER key.
(There you go.! You have you own wifi for free!.)
If you want to stop your WiFi: Type "netsh wlan stop hostednetwork". Then Press ENTER key.
To see whos connected on your Wifi, you can use this free tools:
Download: see in the attachment
Password: imbz_ph
Enjoy just feedback
Hope na nakatulong ako .