 PH
PH- Basahing mabuti
- Recycle Bin Corrupted - Cannot Delete File or FolderHow to Fix a Corrupted Recycle Bin in Vista, Windows 7, and Windows 8
Published by You do not have permission to view the full content of this post. Log in or register now.Category: Performance & Maintenance
You do not have permission to view the full content of this post. Log in or register now.
How to Fix a Corrupted Recycle Bin in Vista, Windows 7, and Windows 8
 Information
If you cannot Empty Recycle Bin or delete a file or folder inside the Recycle Bin, then this will show you how to fix the corrupted Recycle Bin so that you can by resetting it. This is done by deleting the Recycle Bin of each affected hard drive to have Windows automatically create a new clean Recycle Bin afterwards that will work properly again.
 Warning
This will permanently delete all files in the Recycle Bin for all user accounts on the computer
 METHOD ONE
To Fix Corrupted Recycle Bin Using an Elevated Command Prompt
NOTE: You may need to repeat this inside of each hard drive or partition letter that you have displayed in Computer.
1. Open an You do not have permission to view the full content of this post. Log in or register now..
2. In the elevated command prompt, type the command below and press Enter. (see screenshot below)
NOTE: Substitute Drive-Letter in the commmand below for the actual hard drive letter that the $Recycle.bin file is on.
RD /S /Q Drive-Letter:\$Recycle.bin
For example: If I wanted to delete the $Recycle.bin file on the Cdrive, I would type this below.
RD /S /Q C:\$Recycle.bin
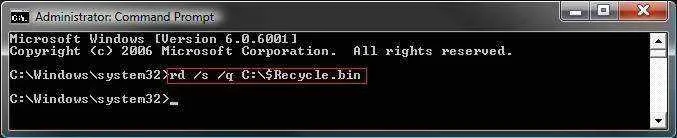
3. Repeat step 2 for any other drive letter that you have.
4. When finished, close the elevated command prompt.
5. Right click on a empty area of the desktop and click on Refresh.
6. The Recycle Bin should be empty now.
NOTE: See also: You do not have permission to view the full content of this post. Log in or register now.
 METHOD TWO
To Fix Corrupted Recycle Bin in Windows Explorer
NOTE: You may need to repeat this inside of each hard drive or partition letter that you have displayed in Computer.
1. Open You do not have permission to view the full content of this post. Log in or register now., and click on the View tab.
A) Select (dot) Show hidden files and folders.
B) Uncheck Hide protected operating system files.
C) Click on OK.
2. Open the Start Menu. (see screenshot below)
A) Click on the Computer button on the darker right side.
NOTE: If you do not have the Computer button, then see OPTION ONE here to add it: You do not have permission to view the full content of this post. Log in or register now.
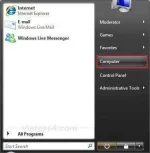
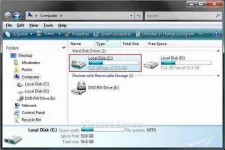
3. Click on the C:\ drive to open it, or the drive that has Vista installed on it. (see screenshot below)
NOTE: For the other hard drive letters, just click on that hard drive letter and repeat the same instructions below.
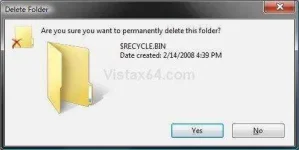
4. Right click on the $RECYCLE.BIN folder, and click Delete. (see screenshot below)
NOTE: If for some reason, Windows will not let you delete this file, then boot into You do not have permission to view the full content of this post. Log in or register now. and try to delete it again.
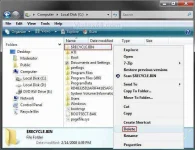
5. Click on Yes. (see screenshot below)
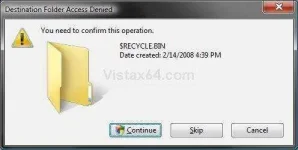
6. Click on Continue. (see screenshot below)
7. Click on Continue in the UAC prompt.
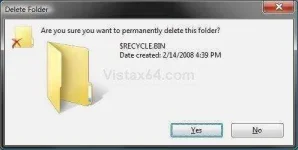
8. Click on Yes. (see screenshot below)
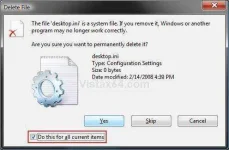
9. Check the Do this for all current items box, then click Yes. (see screenshot below)
10. Repeat steps 3-9 for any other hard drive letter that you have in the Computer window.
11. Vista will then automatically create a new $RECYCLE.BINfolder and Recycle Bin on the Desktop for you afterwards.
NOTE: You may need to press F5 to refresh the window to see the new $RECYCLE.BIN folder. If you still do not see a new one, then restart the computer to have it create a new one for you. See also: You do not have permission to view the full content of this post. Log in or register now.
12. Right click on a empty area of the desktop and click on Refresh.
13. Open You do not have permission to view the full content of this post. Log in or register now., and click on the View tab.
A) Select (dot) Don't show hidden files and folders.
B) Check Hide protected operating system files.
C) Click on OK.
That's it,
Sa kanya kayo mag thanks wag saaken

 )
)