This thread will help you how to create HTTP Injector Configure
[By: jjarongay]
(Note: you need to change the APN to 'You do not have permission to view the full content of this post. Log in or register now.')
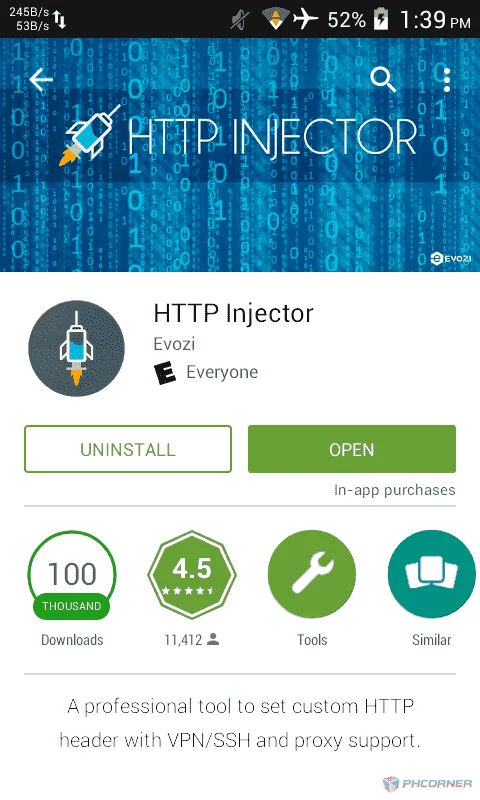
1.) Download 'HTTP Injector' app on Google Play Store (Need an latest app)
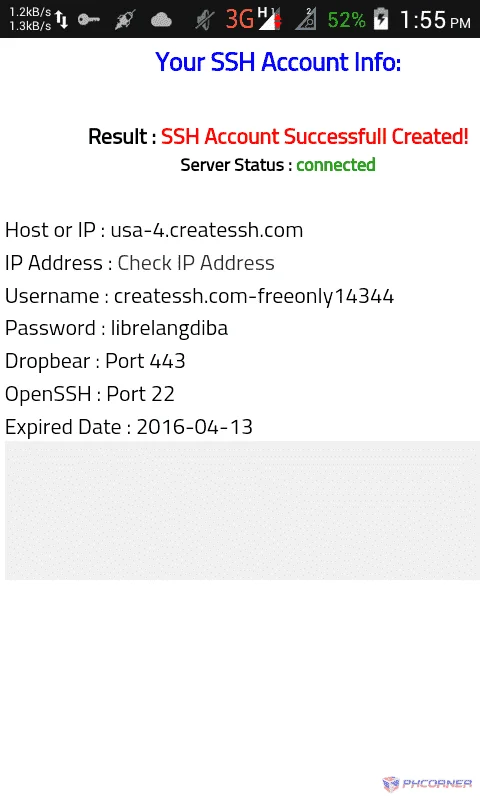
2.) Create an SSH Account at
• You do not have permission to view the full content of this post. Log in or register now.
• You do not have permission to view the full content of this post. Log in or register now.
• You do not have permission to view the full content of this post. Log in or register now.
• You do not have permission to view the full content of this post. Log in or register now.
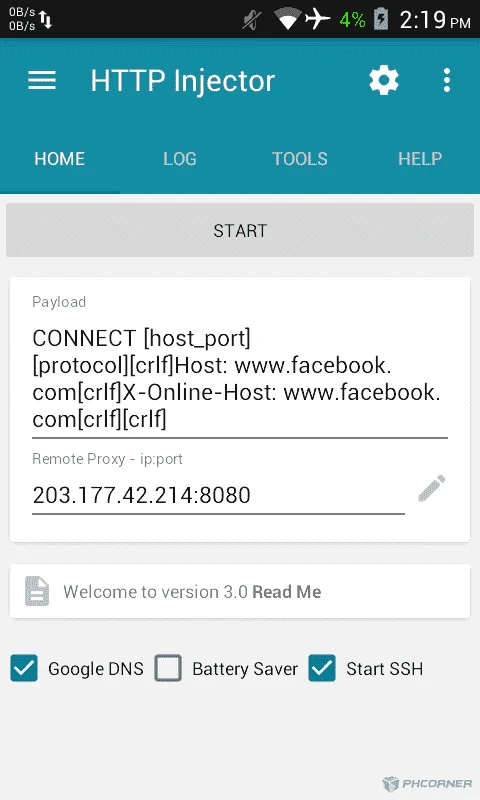
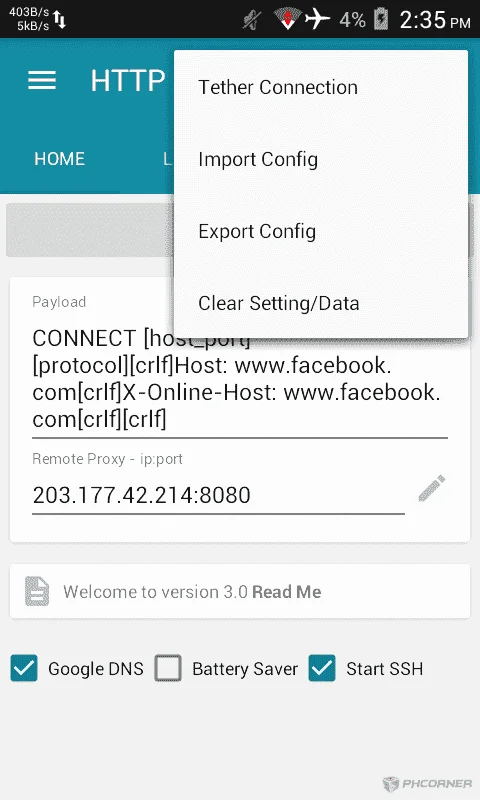
3.) Open 'HTTP Injector' app and set-up payload and remote proxy:
Payloader: CONNECT [host_port] [protocol][crlf]Host: You do not have permission to view the full content of this post. Log in or register now.[crlf]X-Online-Host: You do not have permission to view the full content of this post. Log in or register now.[crlf][crlf]
Remote Proxy: 203.177.42.214:8080
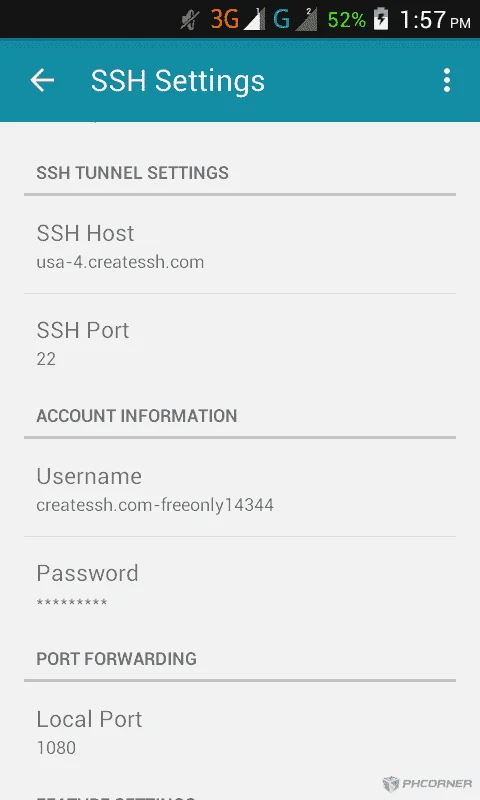
4.) Set-up the SSH Account (Press More Options icon then SSH Account
SSH Host: (host or server example 'usa-1.createssh.com')
SSH Port: 22
Username: (username ex 'createssh.com-freeonly14344')
Password: (password)
5.) Back and tick 'Google DNS'
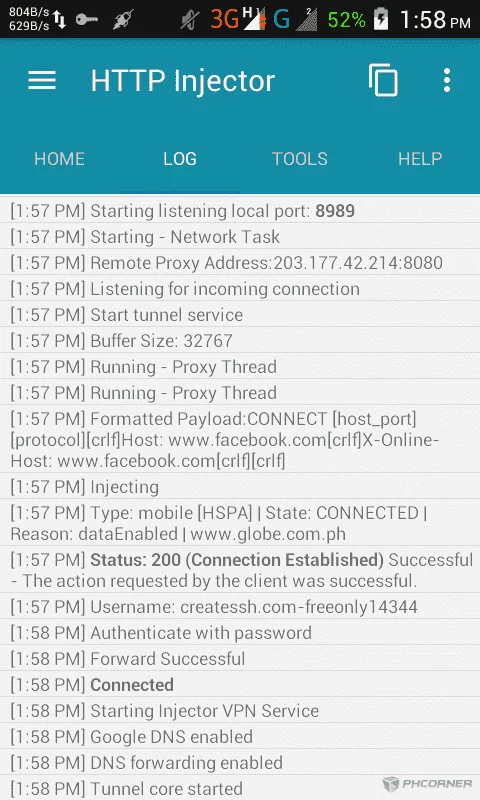
6.) Press 'CONNECT' button and observer the Logs
[Now, you know how to create SSH Account and connect it, and now lets save the config]
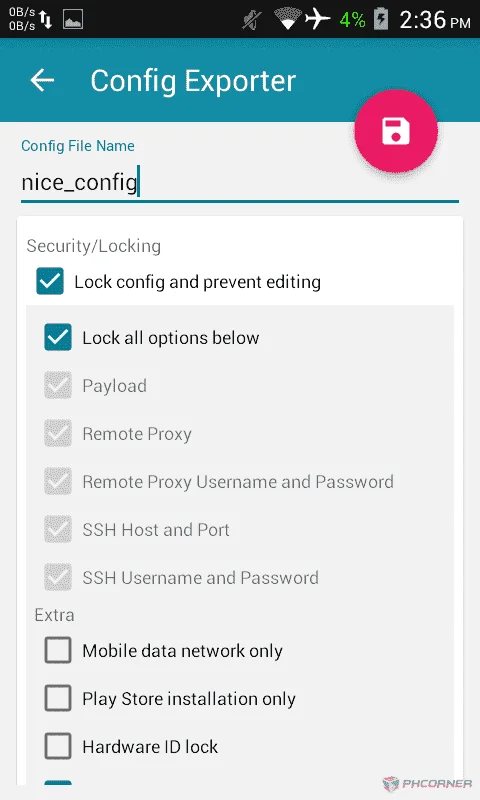
1.) Open 'Menu' icon at the top and select 'Export Config'
2.) And now, set-up the configure
(Copyright © 2016 - Jevie Jarongay)
[Giving credit to me is enough]
[By: jjarongay]
(Note: you need to change the APN to 'You do not have permission to view the full content of this post. Log in or register now.')
1.) Download 'HTTP Injector' app on Google Play Store (Need an latest app)
2.) Create an SSH Account at
• You do not have permission to view the full content of this post. Log in or register now.
• You do not have permission to view the full content of this post. Log in or register now.
• You do not have permission to view the full content of this post. Log in or register now.
• You do not have permission to view the full content of this post. Log in or register now.
3.) Open 'HTTP Injector' app and set-up payload and remote proxy:
Payloader: CONNECT [host_port] [protocol][crlf]Host: You do not have permission to view the full content of this post. Log in or register now.[crlf]X-Online-Host: You do not have permission to view the full content of this post. Log in or register now.[crlf][crlf]
Remote Proxy: 203.177.42.214:8080
4.) Set-up the SSH Account (Press More Options icon then SSH Account
SSH Host: (host or server example 'usa-1.createssh.com')
SSH Port: 22
Username: (username ex 'createssh.com-freeonly14344')
Password: (password)
5.) Back and tick 'Google DNS'
6.) Press 'CONNECT' button and observer the Logs
[Now, you know how to create SSH Account and connect it, and now lets save the config]
1.) Open 'Menu' icon at the top and select 'Export Config'
2.) And now, set-up the configure
(Copyright © 2016 - Jevie Jarongay)
[Giving credit to me is enough]
")
")
