PH
PH UNLOCKING BOOTLOADER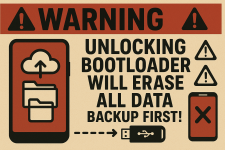
1. Download the Necessary Files:
- Platform Tools:You do not have permission to view the full content of this post. Log in or register now.
- MediaTek USB Drivers:You do not have permission to view the full content of this post. Log in or register now.
2. Extract Platform Tools
- Locate the downloaded platform-tools ZIP file and extract it.
- Go to the extracted folder:
\platform-tools-latest-windows\platform-tools
3. Open Command Prompt
- Inside the folder, type cmd in the address bar and press Enter.
- This will open a Command Prompt window in the platform-tools folder.
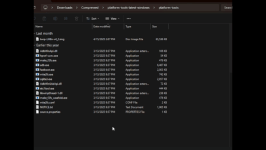
4. Follow the Bootloader Unlock Instructions
- Go to this guide:You do not have permission to view the full content of this post.
Log in or register now.
(For Windows users: do NOT include ./ when typing commands)
 Congrats! Your bootloader is now unlocked.
///////////////////////////////////////////////////////////////////////////////////////////////////////////////////////////////////////////////////////////////////////
 ROOTING (With Magisk)
1. Download Required Files:
- Platform Tools (Skip if already downloaded)
- MTK USB Driver (Skip if already downloaded)
- Magisk APK:You do not have permission to view the full content of this post.
Log in or register now.
(You may also explore KernelSU and APatch, but this guide focuses on Magisk)
- Firmware / ROM Files:
- You do not have permission to view the full content of this post. Log in or register now.
- You do not have permission to view the full content of this post. Log in or register now.
 You only need the correct boot.img file from the firmware matching your build number.
2.  Find Your BUILD NUMBER (IMPORTANT)
Using the wrong boot.img can cause a bootloop or even brick your device.How to check:
- Go to Settings > My Phone > Version Info
- Look for the Build Number and Version Code (e.g., V781)

3. Get Your boot.img
- Extract it from the downloaded ROM file (based on your build version)
Tecno Pova 5 Pro | Diives | OFFICIAL >LH8n<
Use Internet Download Manager (IDM) for faster downloads from NeedROM.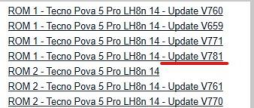
4. ρá†ch
- Send the boot.img file to your device
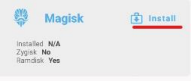
- Open the Magisk app
- Tap Install, then Select and ρá†ch a File
- Choose the boot.img and tap Let’s Go
- The patched file will be saved in Downloads as:
magisk_patched-********.img
5. Flash the Patched
On your PC:
- Transfer magisk_patched-********.img to the platform-tools folder
- Open a Command Prompt in that folder (cmd in address bar)
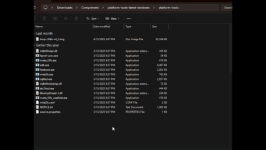
- Connect your device via USB (with USB Debugging enabled)
- Run the following commands:
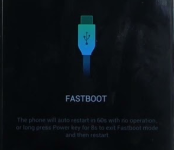
MAKE SURE USB DEBUGGING MODE IS ON.
Once in fastboot mode:
fastboot flash boot magisk_patched-********.img
 Alternatively, rename the file to boot.img and run:
fastboot flash boot boot.img
Finally, reboot your device:
fastboot reboot
6. Verify Root
- Once your phone reboots, open the Magisk app
- It may ask you to reboot again — tap OK
Congratulations! Your device is now rooted with Magisk. BONUS:TWRP & OFOX (CUSTOM RECOVERIES)
TWRP - You do not have permission to view the full content of this post. Log in or register now.
OFOX - You do not have permission to view the full content of this post. Log in or register now.
Flashing instructions:
1. Via Fastboot
• Download and move the .img file into platform tools folder
• Open platform tools folder and open CMD:
"adb reboot bootloader"
"fastboot flash vendor_boot Filename.img"
"fastboot reboot recovery"
Do With Your Own Risk.
I am not responsible for any damage or data loss
that may occur to your device.
Ensure you understand the risks and have backed up necessary data.
Ask nalang if may katanungan.