 PH
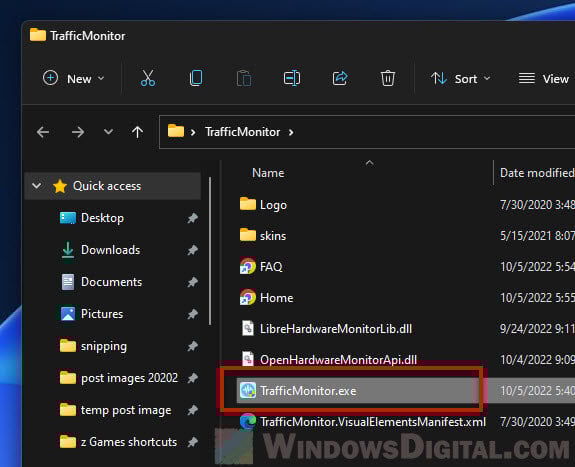
PH- Once downloaded, unzip the file and open the TrafficMonitor.exe from the extracted folder.
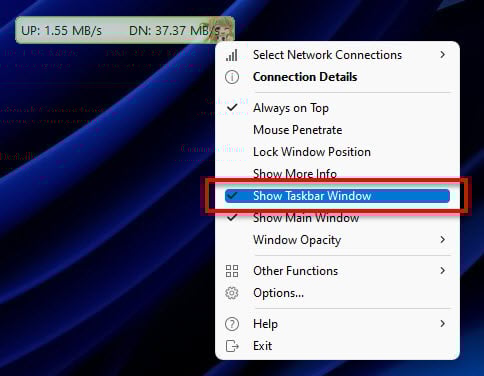
- The app will start off with a floating network speed monitor gadget on the desktop which you can move around easily. To enable it to show on the taskbar instead, right-click the floating network meter and select “Show Taskbar Window“.
- The net speed monitor will now be displayed on the Windows 11 taskbar.
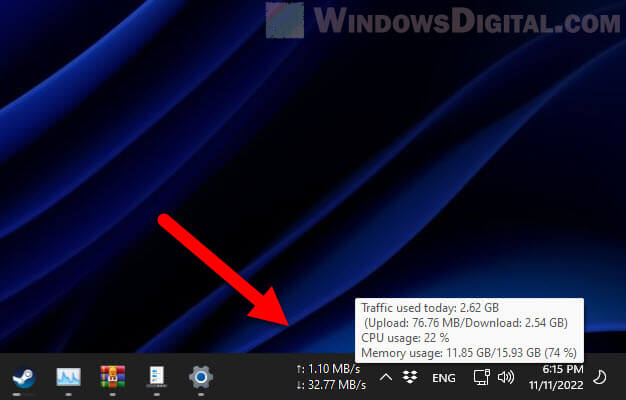
When you hover your mouse cursor over the speed meter, it will display more details such as the total traffic used today (upload and download), as well as the CPU and Memory usage in percentage.
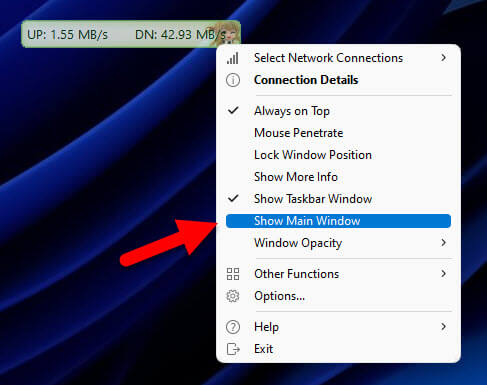
If you don’t want the floating network meter to display on the desktop, right-click on the gadget and uncheck “Show Main Window”. This option will disable traffic monitor from showing on the desktop.
Configure Traffic Monitor to auto start on Windows startup
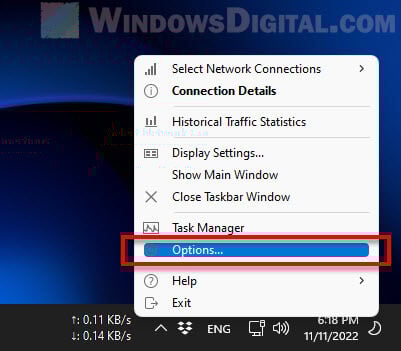
As Traffic Monitor needs to be running in Windows 11 in order for the net speed monitor to continue displaying on the taskbar, to save you the hassles from having to run the app every time you startup your computer, you can set the app to automatically run when Windows starts.To do so, right-click the net speed monitor on the taskbar and select Options.
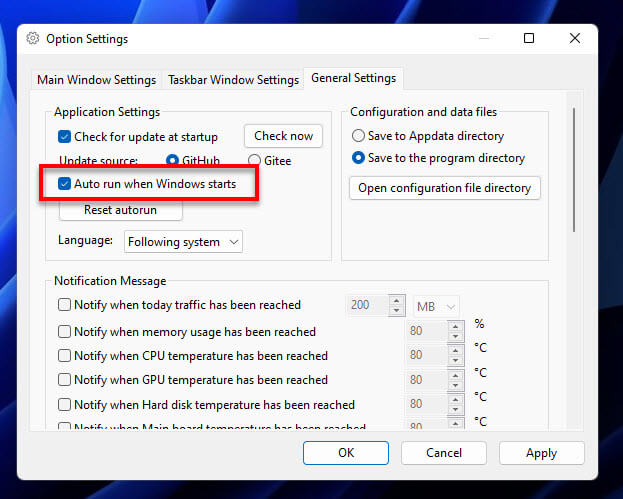
Next, go to the “General Settings” tab and enable the checkbox for “Auto run when Windows Starts” under Application Settings.
In the mean time, you can also configure other settings from the “Taskbar Window Settings” tab for the net speed monitor on the taskbar or the “Main Window Settings” tab for the floating meter.
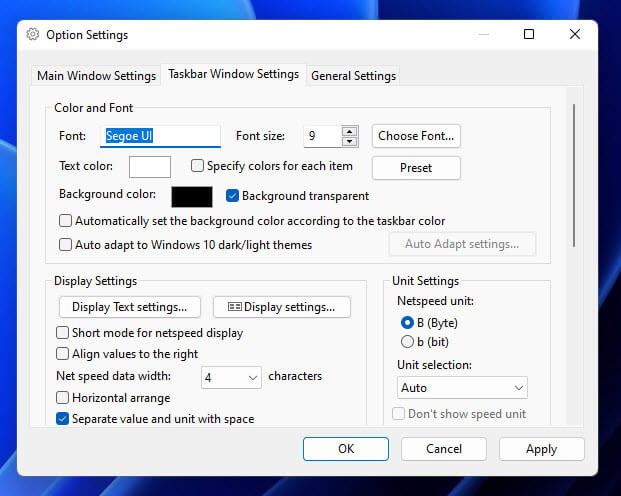
You can change settings such as the color and font of the speed meter, netspeed unit used (Byte or bit), and other display settings.
You do not have permission to view the full content of this post. Log in or register now.
You do not have permission to view the full content of this post. Log in or register now.
