 PH
PHHello Again and Good Day,
Nag Lock ba ang Computer and/or Laptop at may Error na "The Referenced Account Is Currently Locked Out"?
Well you're in Luck Again, Today I'll Teach you how to Fix It.
Download the Needed Application First:
LAZESOFT a Free Windows Password Remover, Password and Data Recovery.
Click You do not have permission to view the full content of this post. Log in or register now. or use this Link: You do not have permission to view the full content of this post. Log in or register now.
Prepare a 4/8/16/32/64GB or Any USB Flash Drive.
* note it will Reformat the USB Flash Drive to make it Bootable so Back Up your Datas first.
Get Ready to Use Another Device/Laptop/Computer as the First Device is Locked.
================================================================================
1. Download and Install Lazesoft from the Link.
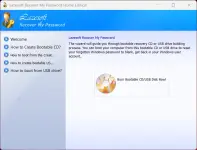
3. It will Open This:
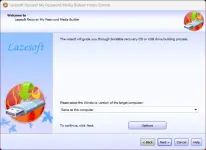
4. Now Click on the Dropdown that says "Same as this Computer" and Select the Locked Computer Windows OS Version This Time I'll use Windows 11. Now Click on Next
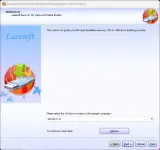
5. Select USB Flash and if Asked, the Letter where the Flash Drive is Plugged In, Then Click Start.
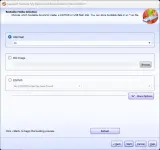
6. Watch Anime, Reels, YouTube or Listen to Music as this will Take a While.
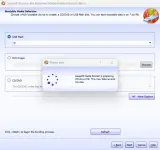
7. And Done, Now We have the Ultimate Weapon, Use It Wisely ("With Great Power comes Greater Electricity Bill.").
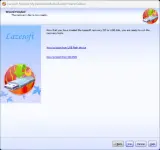
8. Shutdown the Locked Laptop/Computer, Plug In the USB Flash Drive then Turn On the Locked Device.
9. While the Device is Powering Up Continuously Tap One of the Following:
12. Select Password Recovery on the Dropdown Select Reset Windows Password, Select Next then Yes then Next, Then Select the Username you want the Password Removed Then Next.
Nag Lock ba ang Computer and/or Laptop at may Error na "The Referenced Account Is Currently Locked Out"?
Well you're in Luck Again, Today I'll Teach you how to Fix It.
Download the Needed Application First:
LAZESOFT a Free Windows Password Remover, Password and Data Recovery.
Click You do not have permission to view the full content of this post. Log in or register now. or use this Link: You do not have permission to view the full content of this post. Log in or register now.
Prepare a 4/8/16/32/64GB or Any USB Flash Drive.
* note it will Reformat the USB Flash Drive to make it Bootable so Back Up your Datas first.
Get Ready to Use Another Device/Laptop/Computer as the First Device is Locked.
================================================================================
1. Download and Install Lazesoft from the Link.
- Plug In the USB Flash Drive on the Computer where the Lazesoft is Installed.
3. It will Open This:
4. Now Click on the Dropdown that says "Same as this Computer" and Select the Locked Computer Windows OS Version This Time I'll use Windows 11. Now Click on Next
5. Select USB Flash and if Asked, the Letter where the Flash Drive is Plugged In, Then Click Start.
6. Watch Anime, Reels, YouTube or Listen to Music as this will Take a While.
7. And Done, Now We have the Ultimate Weapon, Use It Wisely ("With Great Power comes Greater Electricity Bill.").
8. Shutdown the Locked Laptop/Computer, Plug In the USB Flash Drive then Turn On the Locked Device.
9. While the Device is Powering Up Continuously Tap One of the Following:
- F2 – Acer, ASUS, Dell (some models), Lenovo
- F10 – HP (older models), some ASUS
- F11 – Some HP, Lenovo, and Toshiba systems
- F12 – Dell, Lenovo, Toshiba, and others
- Esc – HP, some Lenovo models
- Delete (Del) – Some ASUS, MSI, and other desktop motherboards
- If you Accidentally manage to Access BIOS Menu Do not Panic, Use your Left or Right Arrow or Mouse to Navigate to Boot / Boot Options / Boot Settings / Advance Boot Option
- Read the Instruction Below or on the Right on How to Move Up your Bootable USB Flash Drive to Set it as Primary or 1st Boot.
- After that Navigate to Exit then Select Save and Exit.
12. Select Password Recovery on the Dropdown Select Reset Windows Password, Select Next then Yes then Next, Then Select the Username you want the Password Removed Then Next.
- Pick Reset/Unlock or Remove to Remove the Password.
- Pick Change if there is an Change Option to Change the Password.
- Click Finish, then Click Reboot or Shutdown, I Highly Suggest Shutdown.
- Remove the Flash Drive and Turn On the Locked Computer.