PH
PHView attachment 2985522
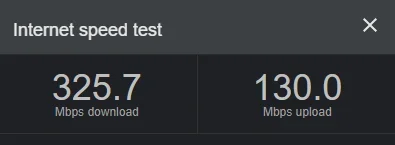
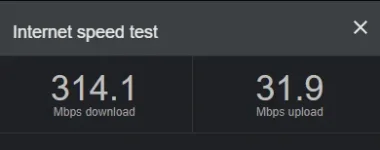
The method is very simple and you can easily change your default DNS and will get the switch to a high-speed DNS. You will experience better internet browsing and download. Just follow up the steps below to proceed.
Step 2. And there click on Change adapter settings.
View attachment 2985523
Step 3. Now there you will see all networks, select the network that you want to configure for Google DNS. Now if you want to change ethernet settings then simply right-click local Area Connection and then select Properties.
View attachment 2985524
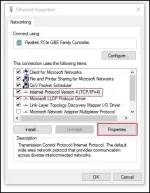
Step 4. Now click on Networking tab and thereunder This connection uses the following items select the option Internet Protocol Version 4 (TCP/IPv4) and then click on properties.
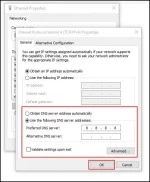
Step 5. Now choose the radio button Use the following DNS server addresses there and there will be written some default IP, simply clear them. Now there fill the value of Google DNS value that is 8.8.8.8 OR 8.8.4.4 and then simply click on “OK” and then restart your network.
That’s it! you are done, now you are switched to Google DNS server and observe the change in your internet speed which will be reasonable.
 SUBUKAN NYO GUYS PROMISE LEGIT TO AT GAMIT KO SYA NOW, FEEDBACK NALANG!!
The method is very simple and you can easily change your default DNS and will get the switch to a high-speed DNS. You will experience better internet browsing and download. Just follow up the steps below to proceed.
Steps To Manually Setup Google DNS On Windows PC
Step 1. First of all, in your windows PC go to the Control Panel and select Network and sharing centerStep 2. And there click on Change adapter settings.
View attachment 2985523
Step 3. Now there you will see all networks, select the network that you want to configure for Google DNS. Now if you want to change ethernet settings then simply right-click local Area Connection and then select Properties.
View attachment 2985524
Step 4. Now click on Networking tab and thereunder This connection uses the following items select the option Internet Protocol Version 4 (TCP/IPv4) and then click on properties.
Step 5. Now choose the radio button Use the following DNS server addresses there and there will be written some default IP, simply clear them. Now there fill the value of Google DNS value that is 8.8.8.8 OR 8.8.4.4 and then simply click on “OK” and then restart your network.
That’s it! you are done, now you are switched to Google DNS server and observe the change in your internet speed which will be reasonable.
SUBUKAN NYO GUYS PROMISE LEGIT TO AT GAMIT KO SYA NOW, FEEDBACK NALANG!!