 PH
PHStatus: STILL WORKING 4/18/26
BLOCKLIST
Block ads & trackers using the most popular blocklists available — all updated in real-time.
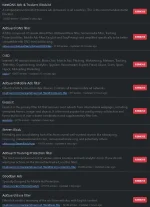
Added: 11/30/24
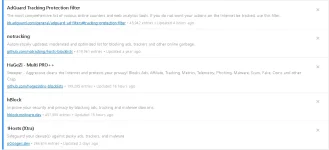
Native Tracking Protection
Block wide spectrum trackers — often operating at the operating system level — that track your activity on a device. This could include all the websites you visit, everything you type or your location at all times.
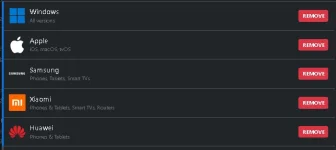




Block paba natin Psite? wag na no? Aha!

Pakibasa nalang po ang mga step kung paano i set-up para sa kanya kanyang device hindi po ako isang propesyonal nais ko lang po i-share ito sa inyo para mapakinabangan natin lahat
wag nyo nalang po ito ipost sa iba o pagkakitaan para hindi ko i delete ang mga profile. Feedback nalang po kayo mga lods. ( Try ko rin i update tong thread mga lods )
Android 9 or higher
1. Go to Settings → Network & internet → Advanced → Private DNS.
2. Select the Private DNS provider hostname option.
3. Enter 286eee.dns.nextdns.io and hit Save.
-----------------------------------------------------------------------------------------------------------
iOS 14 or higher
Use our Apple Configuration Profile Generator available at http: //apple. nextdns. io < paki remove nlng po space
or
1. Install our official app from the App Store.
2. Open the app then go to Settings and toggle "Use Custom Configuration". Enter 286eee as Configuration ID.
3. Enable NextDNS.
----------------------------------------------------------------------------------------------------------------
Windows 11
DNS over HTTPS
NEXTDNS for macOS
1. Install our official app from the Mac App Store.
2. Click on Preferences in the app status bar menu and go to the Configuration tab.
3. Check "Use Custom Configuration" and enter 286eee as Configuration ID.
4. Enable NextDNS.
-----------------------------------------------------------------------------------------------------------
Chrome OS
BLOCKLIST
Block ads & trackers using the most popular blocklists available — all updated in real-time.
Added: 11/30/24
Native Tracking Protection
Block wide spectrum trackers — often operating at the operating system level — that track your activity on a device. This could include all the websites you visit, everything you type or your location at all times.
Block paba natin Psite? wag na no? Aha!
Pakibasa nalang po ang mga step kung paano i set-up para sa kanya kanyang device hindi po ako isang propesyonal nais ko lang po i-share ito sa inyo para mapakinabangan natin lahat
wag nyo nalang po ito ipost sa iba o pagkakitaan para hindi ko i delete ang mga profile. Feedback nalang po kayo mga lods. ( Try ko rin i update tong thread mga lods )
Android 9 or higher
1. Go to Settings → Network & internet → Advanced → Private DNS.
2. Select the Private DNS provider hostname option.
3. Enter 286eee.dns.nextdns.io and hit Save.
-----------------------------------------------------------------------------------------------------------
iOS 14 or higher
Use our Apple Configuration Profile Generator available at http: //apple. nextdns. io < paki remove nlng po space
or
1. Install our official app from the App Store.
2. Open the app then go to Settings and toggle "Use Custom Configuration". Enter 286eee as Configuration ID.
3. Enable NextDNS.
----------------------------------------------------------------------------------------------------------------
Windows 11
DNS over HTTPS
- Open the Settings app.
- Go to Network & internet.
- Click on Wi-Fi (or Ethernet).
- Click on Hardware properties, or ignore this step if you clicked on Ethernet.
- Click the Edit button next to DNS server assignment.
- Select Manual.
- Enable IPv4.
- Enter 45.90.28.0 as Preferred DNS, then select On (manual template) and enter You do not have permission to view the full content of this post. Log in or register now..
- Enter 45.90.30.0 as Alternate DNS, then select On (manual template) and enter You do not have permission to view the full content of this post. Log in or register now..
- Click Save.
-----------------------------------------------------------------------------------------------------------
For NextDnS Windows
1. Download the installer You do not have permission to view the full content of this post. Log in or register now.
2. After installing, right-click on NextDNS icon in the Systray then open the Settings. Set 286eee as Configuration ID.
3. Right-click on NextDNS icon in the Systray, then click on Enable.
OR
IPv6
1. Click on the Start menu, then click on Control Panel.
2. Click on Network and Internet, then Network and Sharing Center.
3. Click on Change Adapter Settings.
4. Right click on the Wi-Fi network you are connected to, then click Properties.
5. Select Internet Protocol Version 6.
6. Click Properties.
7. Click Use The Following DNS Server Addresses.
8. Replace the current addresses (if any) with 2a07:a8c0::28:6eee and 2a07:a8c1::28:6eee.
9. Click OK, then Close. You may need to restart your browser.
OR
IPv4
1. Click on the Start menu, then click on Control Panel.
2. Click on Network and Internet, then Network and Sharing Center.
3. Click on Change Adapter Settings.
4. Right click on the Wi-Fi network you are connected to, then click Properties.
5. Select Internet Protocol Version 4.
6. Click Properties.
7. Click Use The Following DNS Server Addresses.
8. Replace the current addresses (if any) with 45.90.28.93 and 45.90.30.93
9. Click OK, then Close. You may need to restart your browser.
NEXTDNS for macOS
1. Install our official app from the Mac App Store.
2. Click on Preferences in the app status bar menu and go to the Configuration tab.
3. Check "Use Custom Configuration" and enter 286eee as Configuration ID.
4. Enable NextDNS.
-----------------------------------------------------------------------------------------------------------
Chrome OS
- Open the Settings app.
- Go to Security and Privacy.
- Enable Use secure DNS.
- Select With: Custom, then enter You do not have permission to view the full content of this post.
Log in or register now.
----------------------------------------------------------------------------------------------------------
FOR BROWSER

Google Chrome
1. Go to Settings.
2. In the Privacy and security section, click on Security.
3. In the Advanced section, enable Use secure DNS.
4. Select With: Custom, then enter You do not have permission to view the full content of this post. Log in or register now..

Firefox
Windows, macOS and Linux only
1. Open Preferences.
2. Click Privacy & Security.
3. Scroll down to Enable DNS over HTTPS.
4. Choose Increased Protection or Max Protection.
5. Select Custom in the menu.
6. Enter You do not have permission to view the full content of this post. Log in or register now..

Microsoft Edge
1. Open Settings.
2. Go to the Privacy, search, and services section.
3. Under Security, enable Use secure DNS to specify how to lookup the network address for websites.
4. Select Choose a service provider, then enter You do not have permission to view the full content of this post. Log in or register now..

Brave
1. Open Settings.
2. In the Privacy and security section (under Additional settings), go to Security.
3. In the Advanced section, enable Use secure DNS.
4. Select With: Custom, then enter You do not have permission to view the full content of this post. Log in or register now..
----------------------------------------------------------------------------------------------------------
FOR ROUTERS
IPv6
Your network does not support IPv6
1. Open the preferences for your router. Usually you can access it from your browser via a URL (like You do not have permission to view the full content of this post. Log in or register now. or You do not have permission to view the full content of this post. Log in or register now./).
2. Locate the DNS settings inside the interface.
3. Remove all addresses (if any) then add 2a07:a8c0::28:6eee and 2a07:a8c1::28:6eee.
4. Click Save (or similar).
Some routers may not support the IPv6 notation above. In that case, use 2a07:a8c0:0000:0000:0000:0000:0028:6eee and 2a07:a8c1:0000:0000:0000:0000:0028:6eee.
OR
IPv4
1. Open the preferences for your router. Usually you can access it from your browser via a URL (like You do not have permission to view the full content of this post. Log in or register now./ or You do not have permission to view the full content of this post. Log in or register now./).
2. Locate the DNS settings inside the interface.
3. Remove all addresses (if any) then add 45.90.28.93 and 45.90.30.93.
4. Click Save (or similar).
OR
MikroTik
Run the following:
/tool fetch url=You do not have permission to view the full content of this post. Log in or register now.
/certificate import file-name=cacert.pem
/ip dns set servers=""
/ip dns static add name=dns.nextdns.io address=45.90.28.0 type=A
/ip dns static add name=dns.nextdns.io address=45.90.30.0 type=A
/ip dns static add name=dns.nextdns.io address=2a07:a8c0:: type=AAAA
/ip dns static add name=dns.nextdns.io address=2a07:a8c1:: type=AAAA
/ip dns set use-doh-server=“You do not have permission to view the full content of this post. Log in or register now.286eee” verify-doh-cert=yes
Nasa itaas na po yung first Profile natin ito pa ang mga additional profile para sa inyo
Additional Private DNS/Address
11/28/24
Profile 2
DNS-over-TLS/QUIC
146aed.dns.nextdns.io
DNS-over-HTTPS
You do not have permission to view the full content of this post. Log in or register now.
IPv6
2a07:a8c0::14:6aed
2a07:a8c1::14:6aed
DNS Servers
45.90.28.249
45.90.30.249
---------------------------------------------------------------------------
Profile 3
DNS-over-TLS/QUIC
688c7d.dns.nextdns.io
DNS-over-HTTPS
You do not have permission to view the full content of this post. Log in or register now.
IPv6
2a07:a8c0::68:8c7d
2a07:a8c1::68:8c7d
DNS Servers
45.90.28.240
45.90.30.240
----------------------------------------------------------------------------
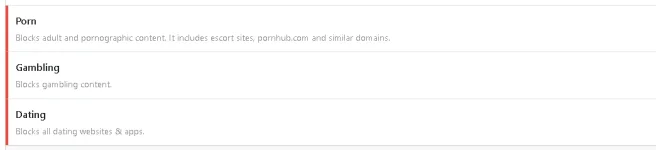
Profile 4 ( NO P*RN/GA*BLING/DATING/ ) (UPDATE 11/30/24 )
 DNS-over-TLS/QUIC
4634e4.dns.nextdns.io
DNS-over-HTTPS
You do not have permission to view the full content of this post. Log in or register now.
IPv6
2a07:a8c0::46:34e4
2a07:a8c1::46:34e4
DNS Servers
45.90.28.66
45.90.30.66