 PH
PHPara sa mga hindi pa nakakasubok, si Kodi ay pwede ring gamitin as Stalker player gamit ang add-on na Stalker Client. Good siya sa mga Live Tv channels pero yung mga Vods at Tv Series ay hindi nya pinapakita kaya hindi ma-access. Sa mga interesado, heto ang procedure:
A. Installation
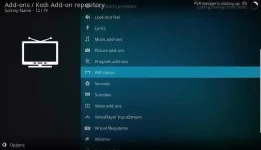
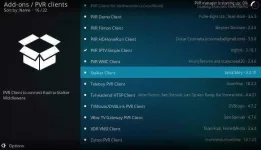
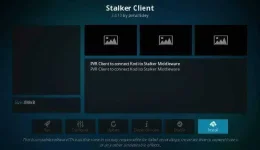
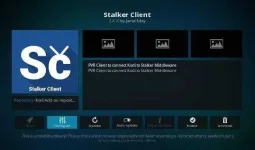
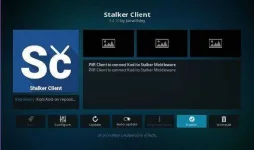
Open Kodi, click Settings (cog wheel) > click Add-ons > click Install from repository > click Kodi Add-on repository > scroll down and click PVR clients > scroll down and click Stalker Client > highlight and click the Install button at hintaying matapos ang installation. Kapag successful ang installation, may lalabas na slide info "Add-ons installed" at magiging check mark yung bullet sa tabi ng Stalker Client sa repository. Please refer to the following figures, para masundan ninyo:
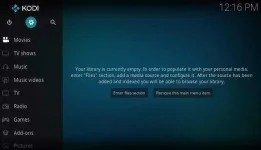
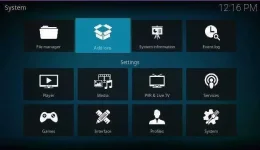
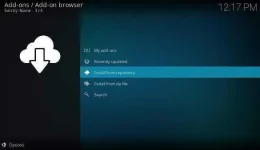
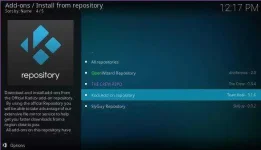
B. Configuration
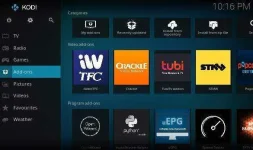
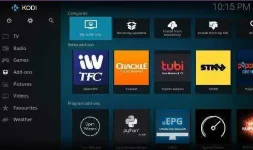
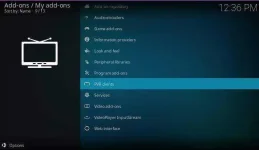
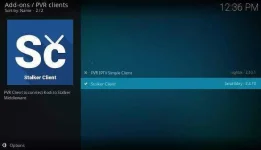
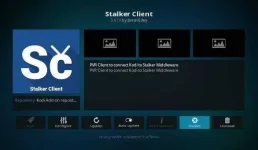
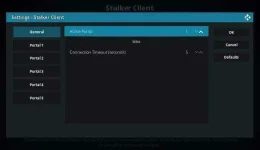
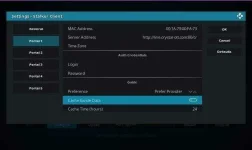
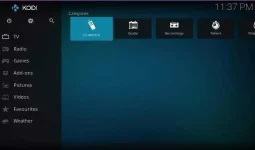
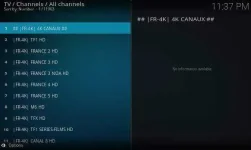
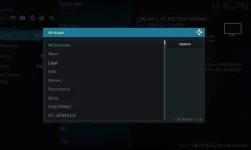
Balik sa Main Menu ni Kodi, scroll down sa Add-ons, lipat sa right pane at click My add-ons > scroll down and click PVR clients > click Stalker Client > highlight and click Disable button > highlight and click Configure > under the General category, note that the Active portal is no. 1, click Portal 1 > lipat sa right pane at i-type ang MAC address > sunod i-type ang Server address, sa Time zone pwedeng blangko na lang, tapos scroll down at i-toggle sa off ang Cache Guide Data > click Ok > highlight and click Enable button, tapos balik sa Main Menu at hintaying mai-load ang mga channels, mga 3 minutes o higit pa may paikot-ikot na ring sa upper right hand corner ng screen ni Kodi, depende yan sa dami ng available channels. Kapag natapos na ang loading, scroll down to highlight TV > click Channels sa right pane para makita yung mga channels. Click Options sa lower left hand corner ng screen ni Kodi at click Groups para maayos na makapamili ng channel na gustong panuorin. Ulitin lang ang procedure para sa natitira pang portals, pares-pares, Active Portal no. 2 para sa Portal no. 2 and so on. Please refer to the following figures, para masundan ninyo:
C. Tips
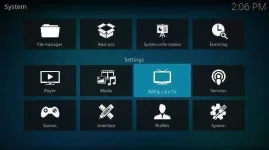
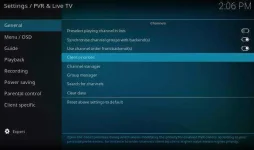
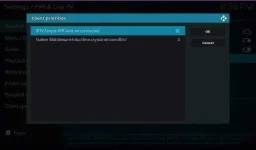
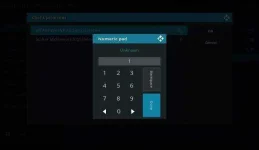
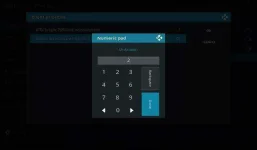
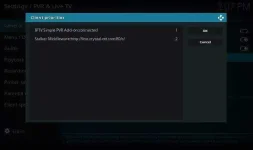
1. Para sa mga Kodi na may active IPTV Simple Client, punta sa Settings (cog wheel) > click PVR & Live TV > under General category, click Client priorities sa right pane > click IPTV Simple PVR Add-on: connected > click Backspace and type 1 > click Done. Next, click Stalker Middleware: http:// so and so..., > click Backspace and type 2 > click Done > click Ok at bumalik na sa Main Menu. Please refer to the following figures para masundan ninyo:
2. Kung minsan hindi naglo-load ang mga channels pag-bukas muli ni Kodi, sa ganitong pagkakataon gawin ang mga sumusunod:
Highlight Add-ons sa Main Menu at click My Add-ons sa right pane > scroll down and click PVR Clients > click Stalker Client > click Disable. (Please refer to the first 5 figures in the Configuration section above).
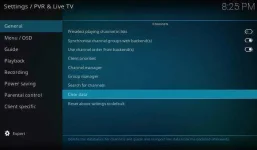
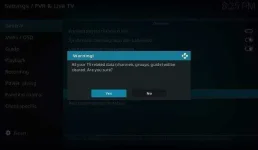
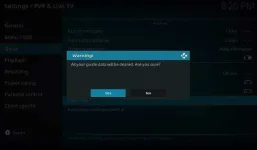
Tapos, bumalik sa Main Menu, click Settings (cog wheel) > click PVR & Live TV > under General category, click Clear Data sa right pane > click Yes sa lalabas na Warning. Next, highlight the Guide category sa left pane > click Clear Data sa right pane > click Yes sa lalabas na Warning.
Next, balik uli kay Stalker Client at click Enable para mag-load uli yung mga channels.
That's all folks, enjoy!
Maligayang Pasko sa inyong lahat!
A. Installation
Open Kodi, click Settings (cog wheel) > click Add-ons > click Install from repository > click Kodi Add-on repository > scroll down and click PVR clients > scroll down and click Stalker Client > highlight and click the Install button at hintaying matapos ang installation. Kapag successful ang installation, may lalabas na slide info "Add-ons installed" at magiging check mark yung bullet sa tabi ng Stalker Client sa repository. Please refer to the following figures, para masundan ninyo:
B. Configuration
Balik sa Main Menu ni Kodi, scroll down sa Add-ons, lipat sa right pane at click My add-ons > scroll down and click PVR clients > click Stalker Client > highlight and click Disable button > highlight and click Configure > under the General category, note that the Active portal is no. 1, click Portal 1 > lipat sa right pane at i-type ang MAC address > sunod i-type ang Server address, sa Time zone pwedeng blangko na lang, tapos scroll down at i-toggle sa off ang Cache Guide Data > click Ok > highlight and click Enable button, tapos balik sa Main Menu at hintaying mai-load ang mga channels, mga 3 minutes o higit pa may paikot-ikot na ring sa upper right hand corner ng screen ni Kodi, depende yan sa dami ng available channels. Kapag natapos na ang loading, scroll down to highlight TV > click Channels sa right pane para makita yung mga channels. Click Options sa lower left hand corner ng screen ni Kodi at click Groups para maayos na makapamili ng channel na gustong panuorin. Ulitin lang ang procedure para sa natitira pang portals, pares-pares, Active Portal no. 2 para sa Portal no. 2 and so on. Please refer to the following figures, para masundan ninyo:
C. Tips
1. Para sa mga Kodi na may active IPTV Simple Client, punta sa Settings (cog wheel) > click PVR & Live TV > under General category, click Client priorities sa right pane > click IPTV Simple PVR Add-on: connected > click Backspace and type 1 > click Done. Next, click Stalker Middleware: http:// so and so..., > click Backspace and type 2 > click Done > click Ok at bumalik na sa Main Menu. Please refer to the following figures para masundan ninyo:
2. Kung minsan hindi naglo-load ang mga channels pag-bukas muli ni Kodi, sa ganitong pagkakataon gawin ang mga sumusunod:
Highlight Add-ons sa Main Menu at click My Add-ons sa right pane > scroll down and click PVR Clients > click Stalker Client > click Disable. (Please refer to the first 5 figures in the Configuration section above).
Tapos, bumalik sa Main Menu, click Settings (cog wheel) > click PVR & Live TV > under General category, click Clear Data sa right pane > click Yes sa lalabas na Warning. Next, highlight the Guide category sa left pane > click Clear Data sa right pane > click Yes sa lalabas na Warning.
Next, balik uli kay Stalker Client at click Enable para mag-load uli yung mga channels.
That's all folks, enjoy!
Maligayang Pasko sa inyong lahat!

